Quickstart guide for Plaid
This section will describe the most common implementation to get Plaid running. We recommend reviewing the Conceptual Overview before getting started.
You will require either the Plaid source code or binaries, and access to the cloud VTN. Please email contact@gridfabric.io if you don't have access to these.
This guide will walk the user through the most basic end to end implementation of Plaid, connecting to GridFabric's Cloud VTN, to provide the user a basis for which to complete their own implementation.
Accessing software packages
If you have purchased a license for Plaid, you will be granted access to the Plaid source code and cloud VTN.
If you would like to test out Plaid functionality using our pre-built binarines before buying, please email contact@gridfabric.io with a description of your use case.
Certificates
To download the test certificates bundle them in Plaid, and follow the guide for generating test certificates then move to the next step.
Update configuration
If you are using the source code, the sample config file is in /nova/nova/config/config.json.sample. Rename it to config.json as you make the updates. For the binaries, it is simply in the config.json file.
The fields to update in this file are as follows. Note that the example is for the source code. Update the file paths accordingly for the binary. They are less nested in the binary version.
{
    "oadr": {
        "venName": "my_test_ven", // update to whichever name you prefer
        "vtnUrl": "https://novadre.nebland.com:4433/oadrapi/ven/<base_url>",
            //update base_url to whatever your instance of the VTN is set to
        "tls": {
            "enable": true,
            //all paths in the config file are with respect to where the executable
            //will run, in this case that is in /build/debug/
            "capath": "../../cacerts/ven_cacerts_test.pemon",
                //CA certificate files - in production you will use prod
            "keypath": "../../certs/privkey.pem",
                //This is the privkey.pem file you put in the certs folder
            "certpath": "../../certs/certchain.pem"
                //This is the concatenated file you created in the prior step
        },
        "marketContexts": [ "default" ]
            // market context will be explained more later on - this will capture any market context
    },
    "plugin": {
        "pluginPath": "libnova-notifierhttp-plugin.so",
            //this is the standard plugin that ships with Plaid
        "configPath":
            "../../pluginimpl/plugin/notifier/http/config/plugin_config.json"
            //this is the config file for the plugin in the source code (it will be in the root directory in the binary)
    }
}
Prepare an endpoint to test callback functions
Any service that allows you track http messages to an endpoint will work for this quickstart. For ease of use, we have had success with beeceptor. We will use this to demonstrate the callback functions the Plugin calls during operation. Create a new endpoint in Beeceptor and copy the full url.
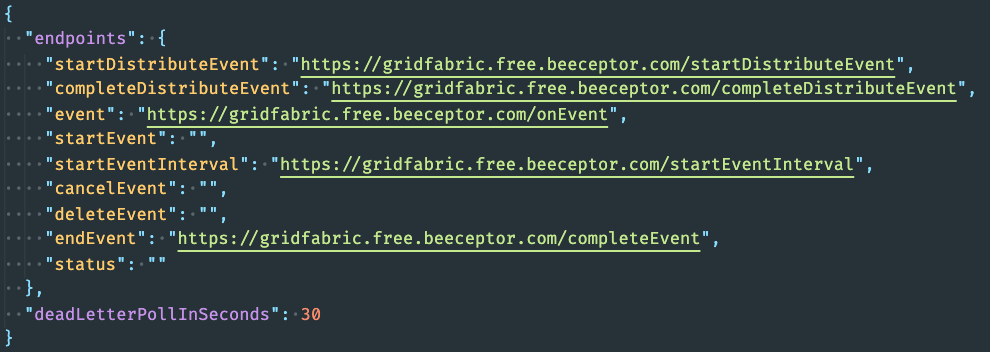
Within source code, find the plugin configuration file at pluginimpl/plugin/notifier/http/config/plugin_config.json.sample (In the binaries it will be in the root folder). Rename it to plugin_config.json when you save. This file has the http endpoints that will receive POSTs from Plaid. All of the endpoints are blank "", replace them all with the the new endpoint you just created.
Then, add it to the config file. Beeceptor also allows you to post to different paths, so you can track which request is posting at a given time.
Build & Run
If you are using the pre-built binaries, you may simply run ./nova schema.json config.json and skip to the end of this section. Make sure that you have the required dependencies installed locally however, and note that the Linux binary will only work with Ubuntu 16.04 (if you would like to run it in a docker container, send us a note at contact@gridfabric.io and we will provide a simple build script).
If using the source code, now is time to build.
Depending on operating system, please follow the appropriate guide to build and run the software. Follow the "debug" build process.
Plaid should now be running locally and will be trying to connect to the VTN. You should see it logging that it is unable to connect and will see the following logged message, among some others. This is because the VTN has not been configured to accept the VEN.
Error executing job (will retry): ven.registration: Registration failed (will retry):
    Registration exception: error code received: 452
Prepare and use the VTN
Now it's time to go to the VTN to complete the connection. Go to https://novadre.nebland.com/ and log in using your provided account information.
Add the VEN
Now to add the VEN. This will be quick because the VEN has already tried to register, so we can take a shortcut by finding the VEN in NOVA DRE.
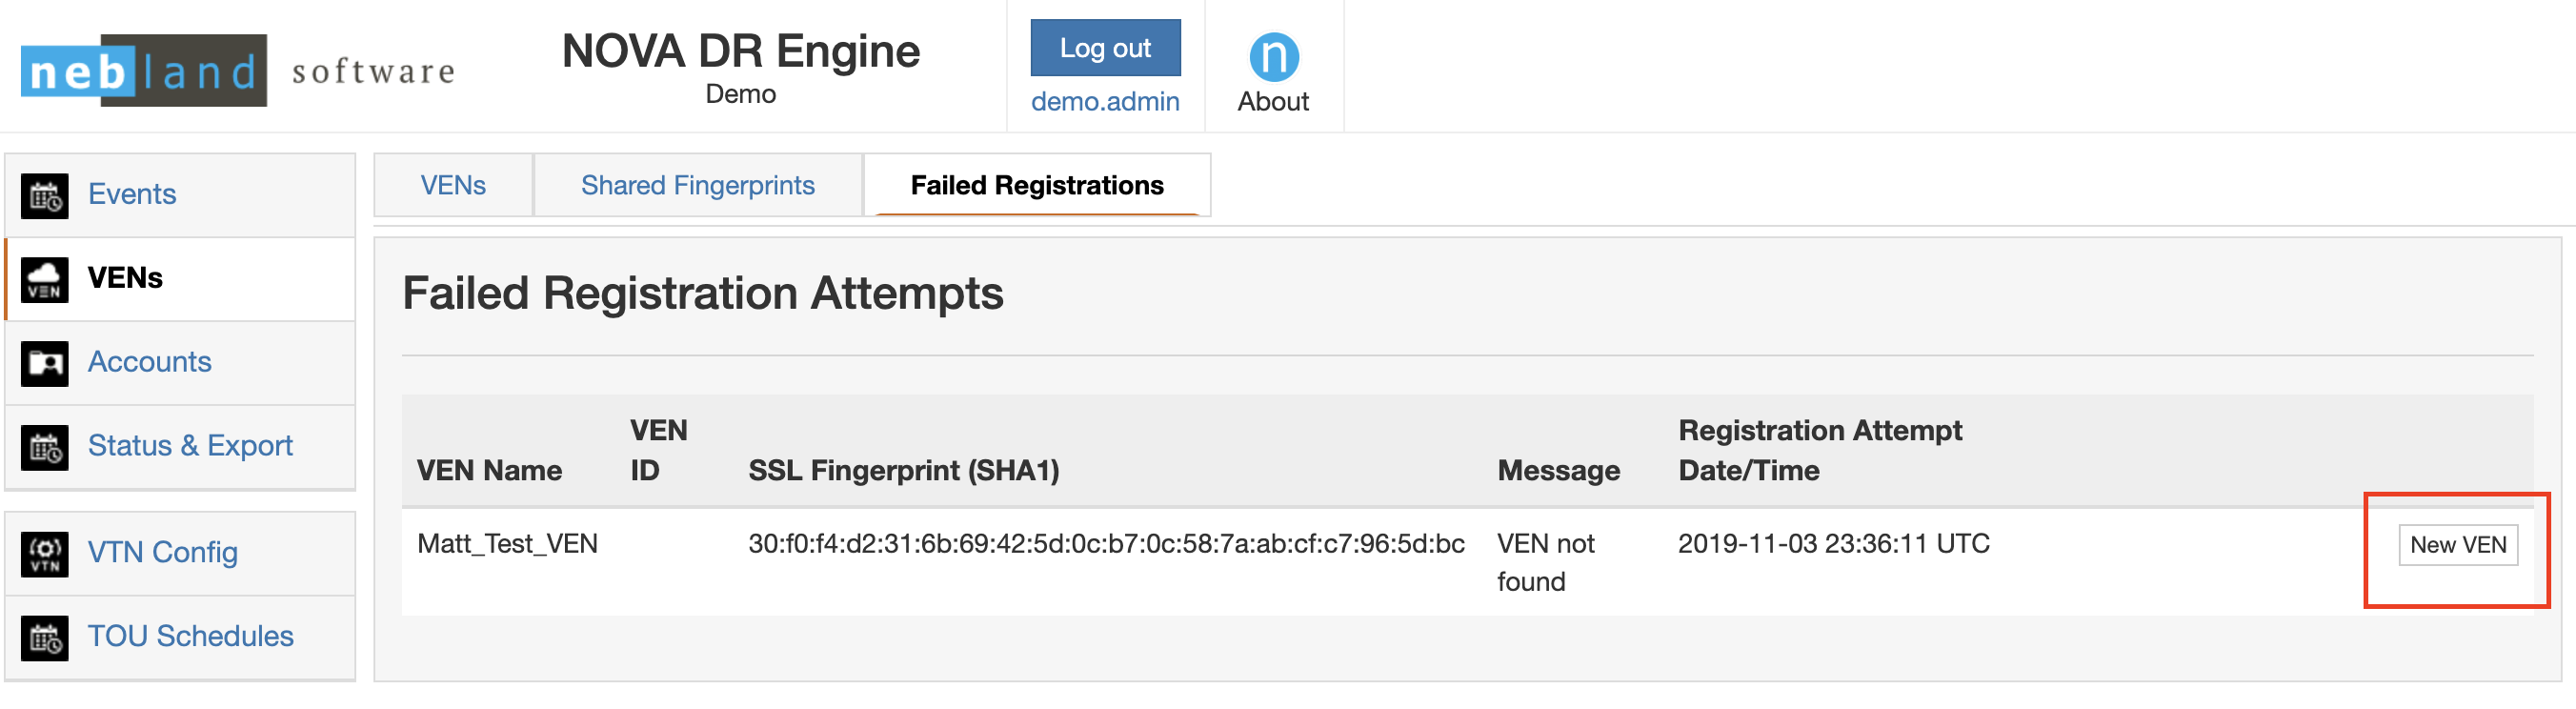
Go to the VENs section and Failed Registrations Tab. You should see your VEN show up there with all it's information, now you just need to add it to the VTN by clicking "New VEN".
On the next screen, just click the Create VEN - you don't need to update any fields here (either a VEN ID or a VEN Name is required, but not both).
After you create the VEN, you should see in back in your Plaid Log that it has registered, with a message that says: VEN Registered.
Your VEN should now be registered. If you now look back at your Beeceptor instance that you created above, you should see that it has run a startDistributeEvent and completeDistributeEvent that is empty, because there are not yet events.

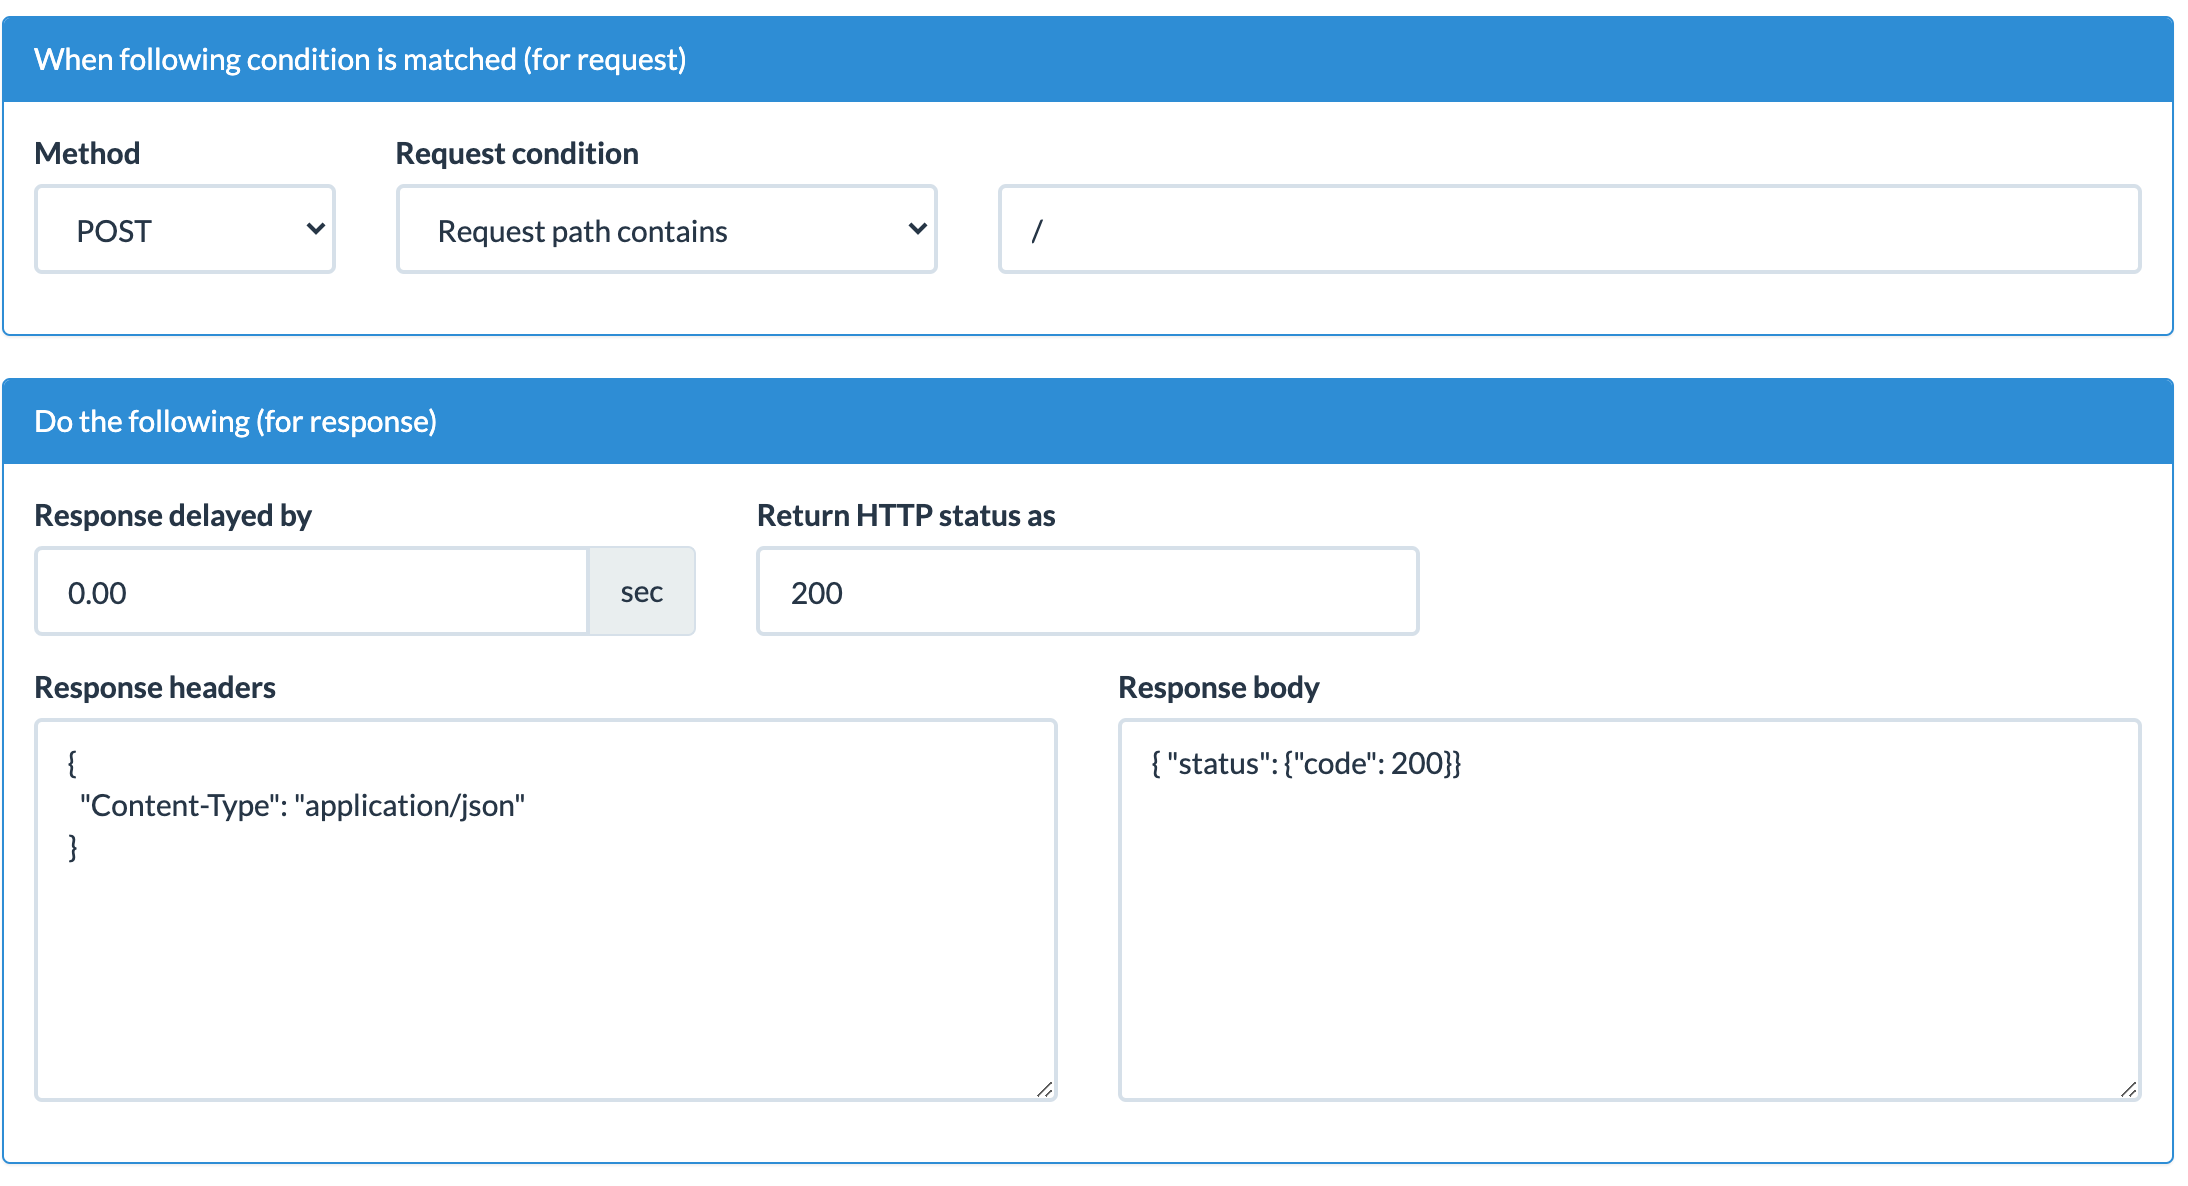
If you see a repeated /startDistributeEvent poll but nothing further, you are also probably seeing an error in the log. This is because older versions of the plugin (and pre-built binary) only accept specifically formatted responses from the endpoint. Click on "mocking rules" in Beeceptor to format the response to be { "status": {"code": 200}}, as shown in the image below. This will resolve the issue and allow you to see all of the callback functions
Create an Event
Now it is time to finish it off by creating an event and seeing it propagate through the VEN.
Update market context
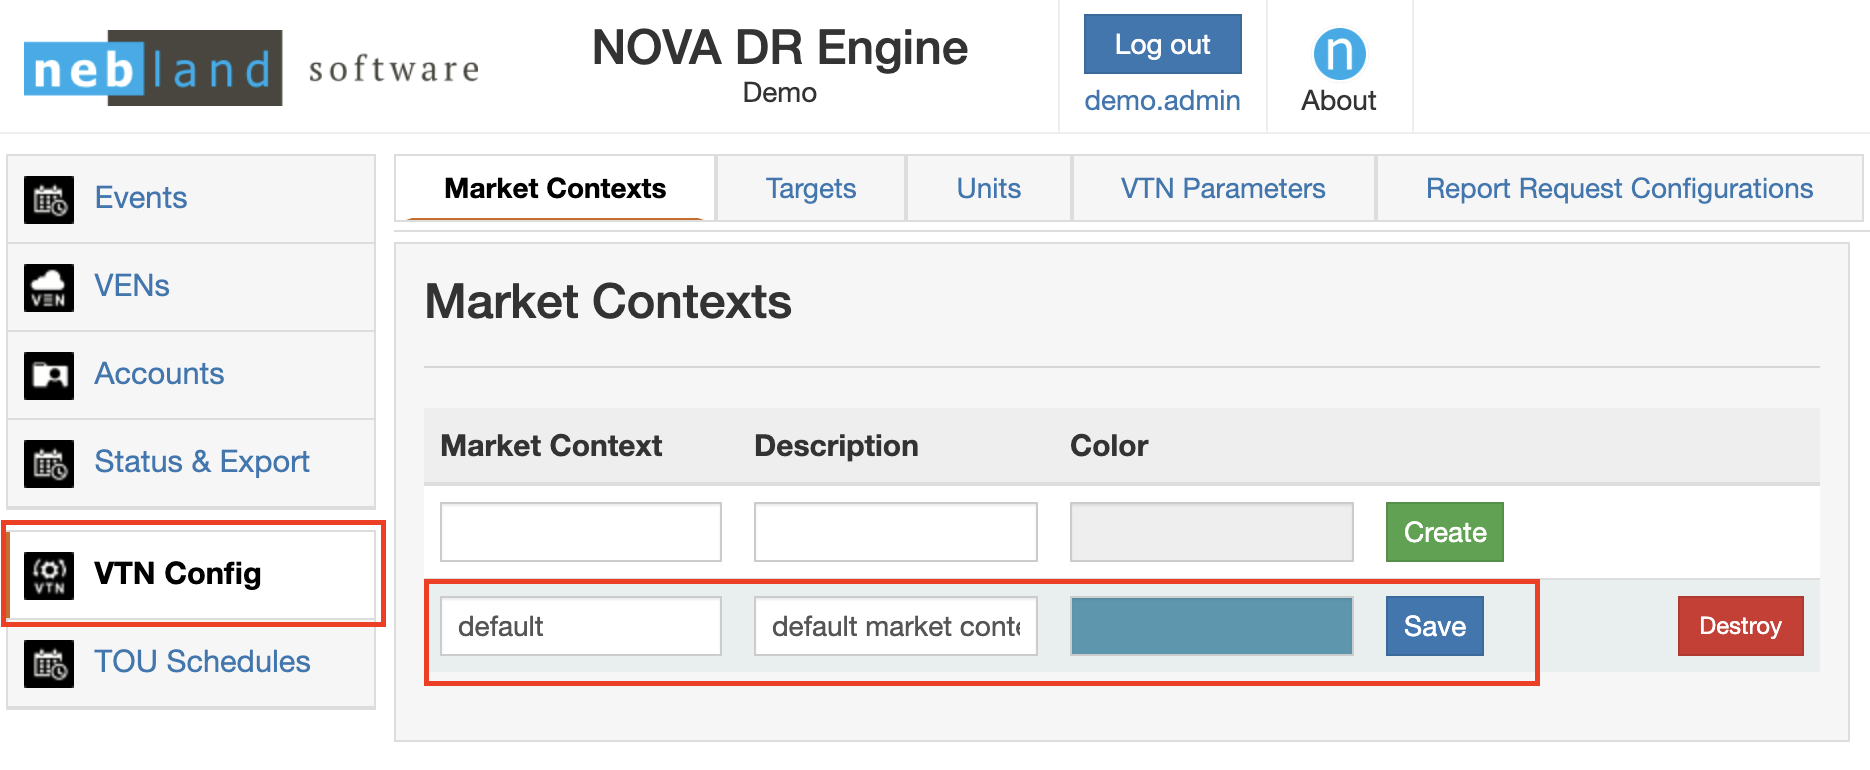
The first thing to do is update the market context. This will be explained in more detail in the VTN guide. For now just create a default market context and click Save. Fill in whatever you like for Description and Color - these aren't used.
Create Event
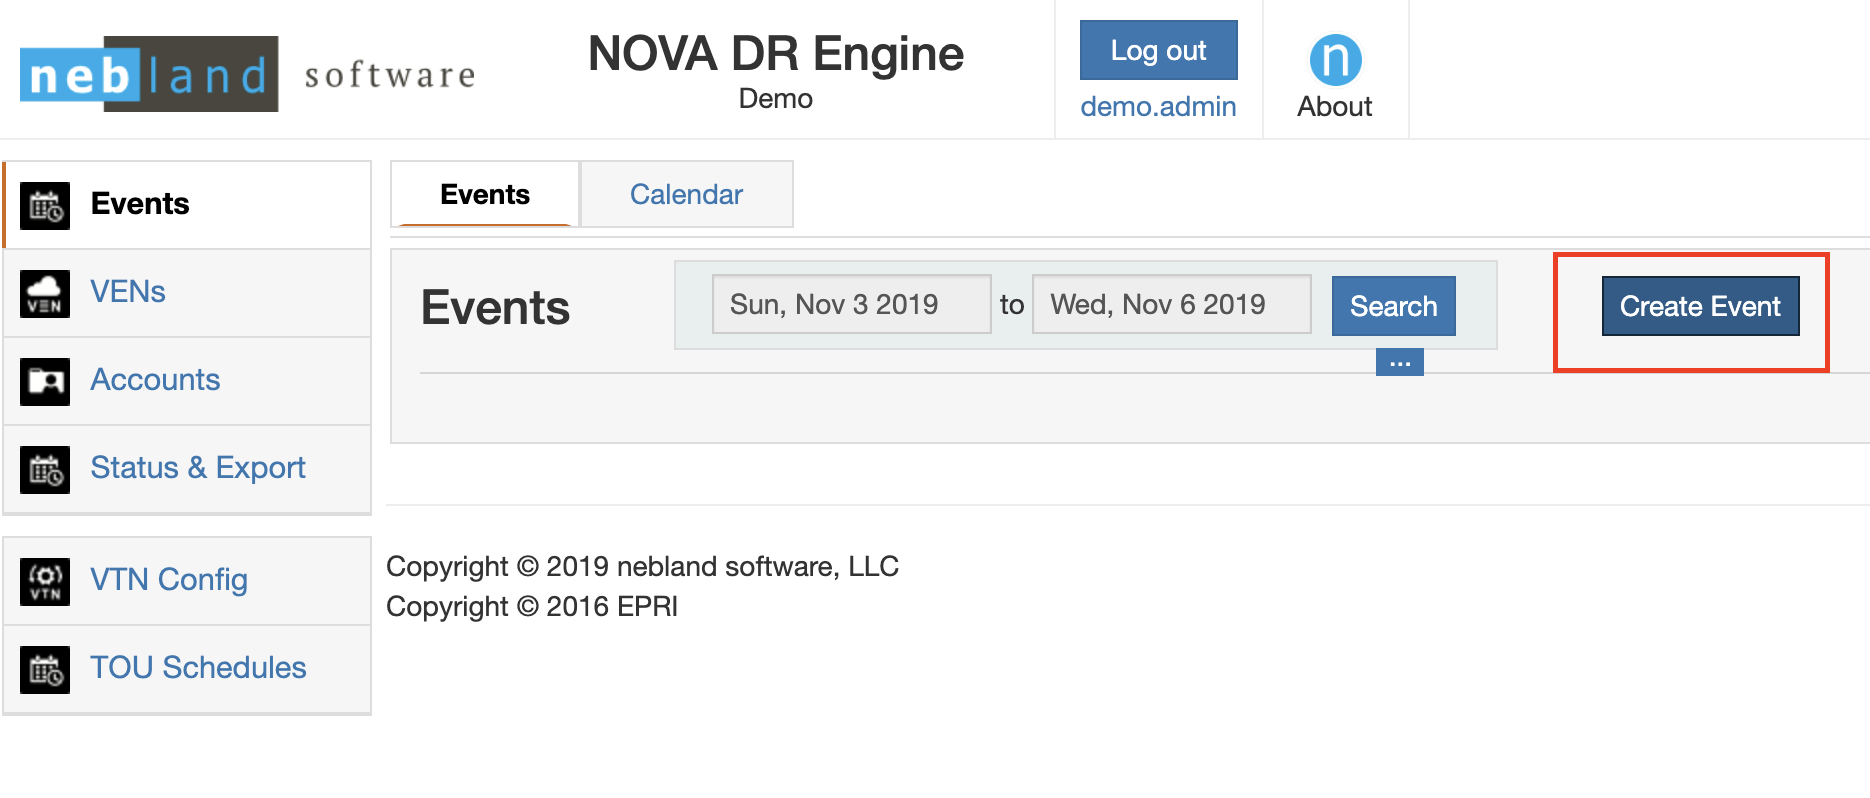
Now create the event. Go to the Events section and click on the "Create Event" button. In the modal that shows up, click "Standard".
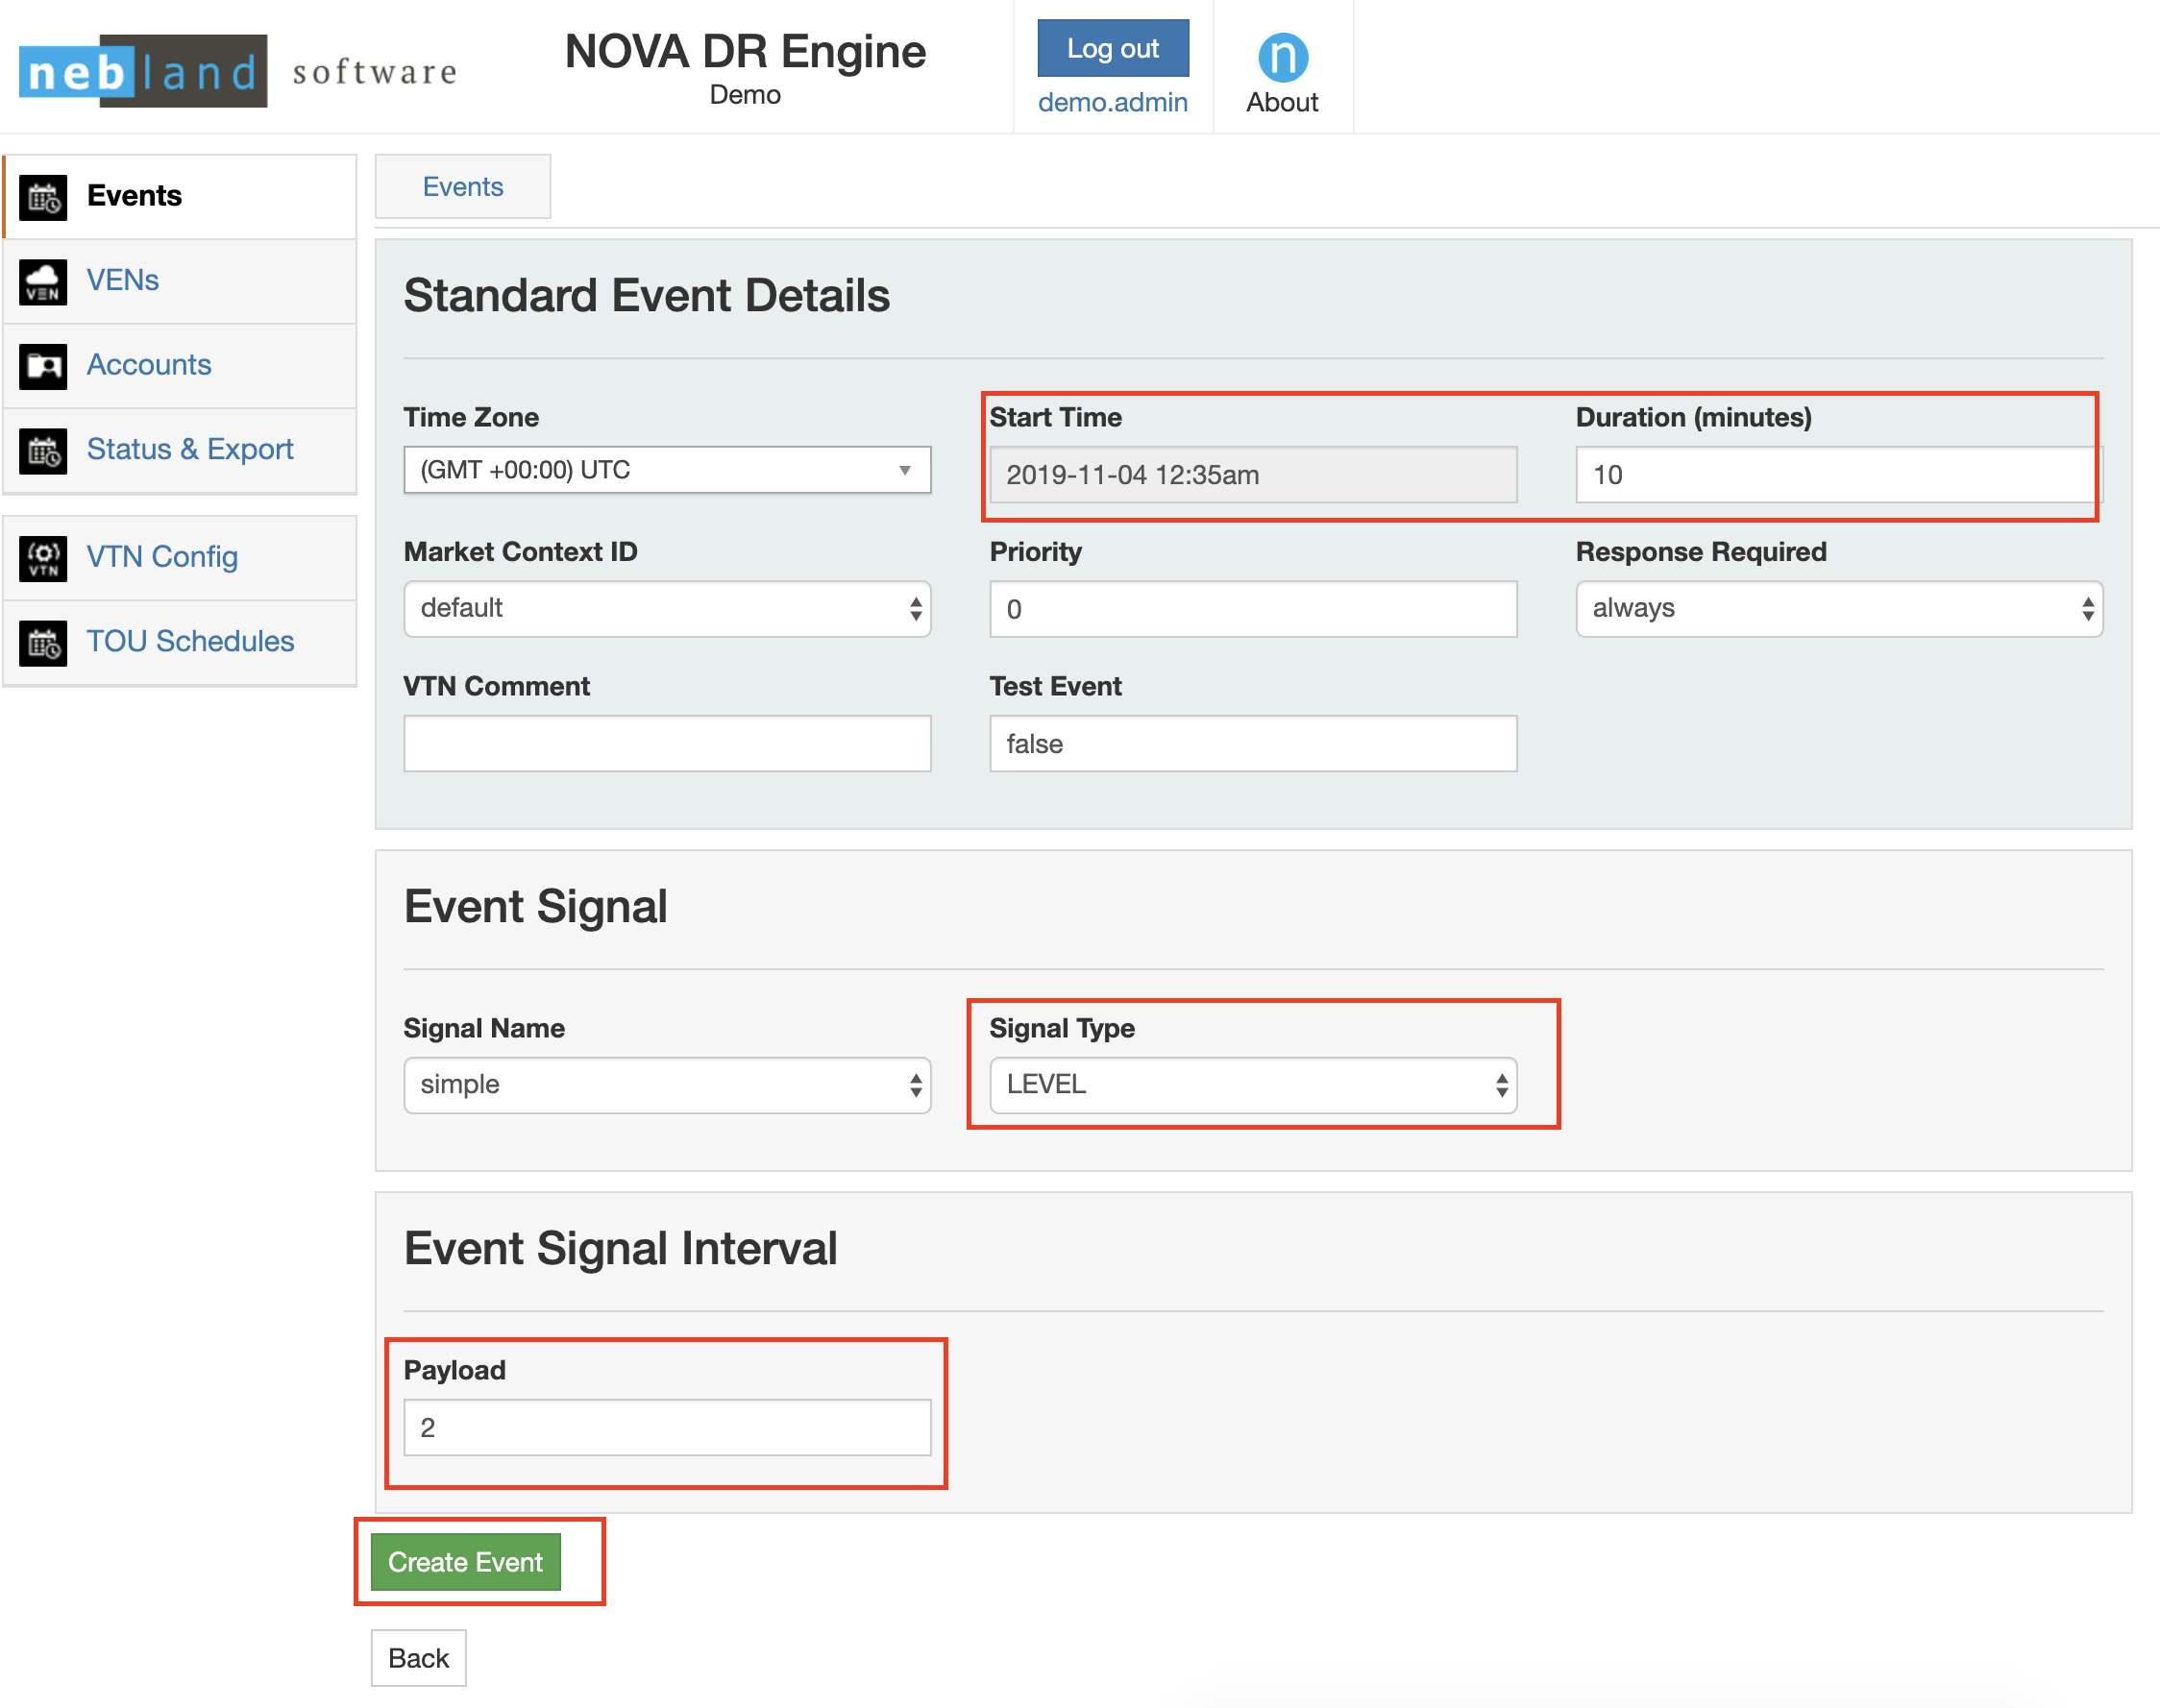
On the next screen, you'll see a number of fields. You only need to update:
- start time: set to near in the future (e.g. a few minutes out minutes). By default, start time is set to the current time, so you just need to add a few minutes.
- duration: set to less than 10 minutes - we will do a quick event so you can see it start and end.
- event signal type & payload: set to LEVEL and 2, respectively.
Now click "Create Event".
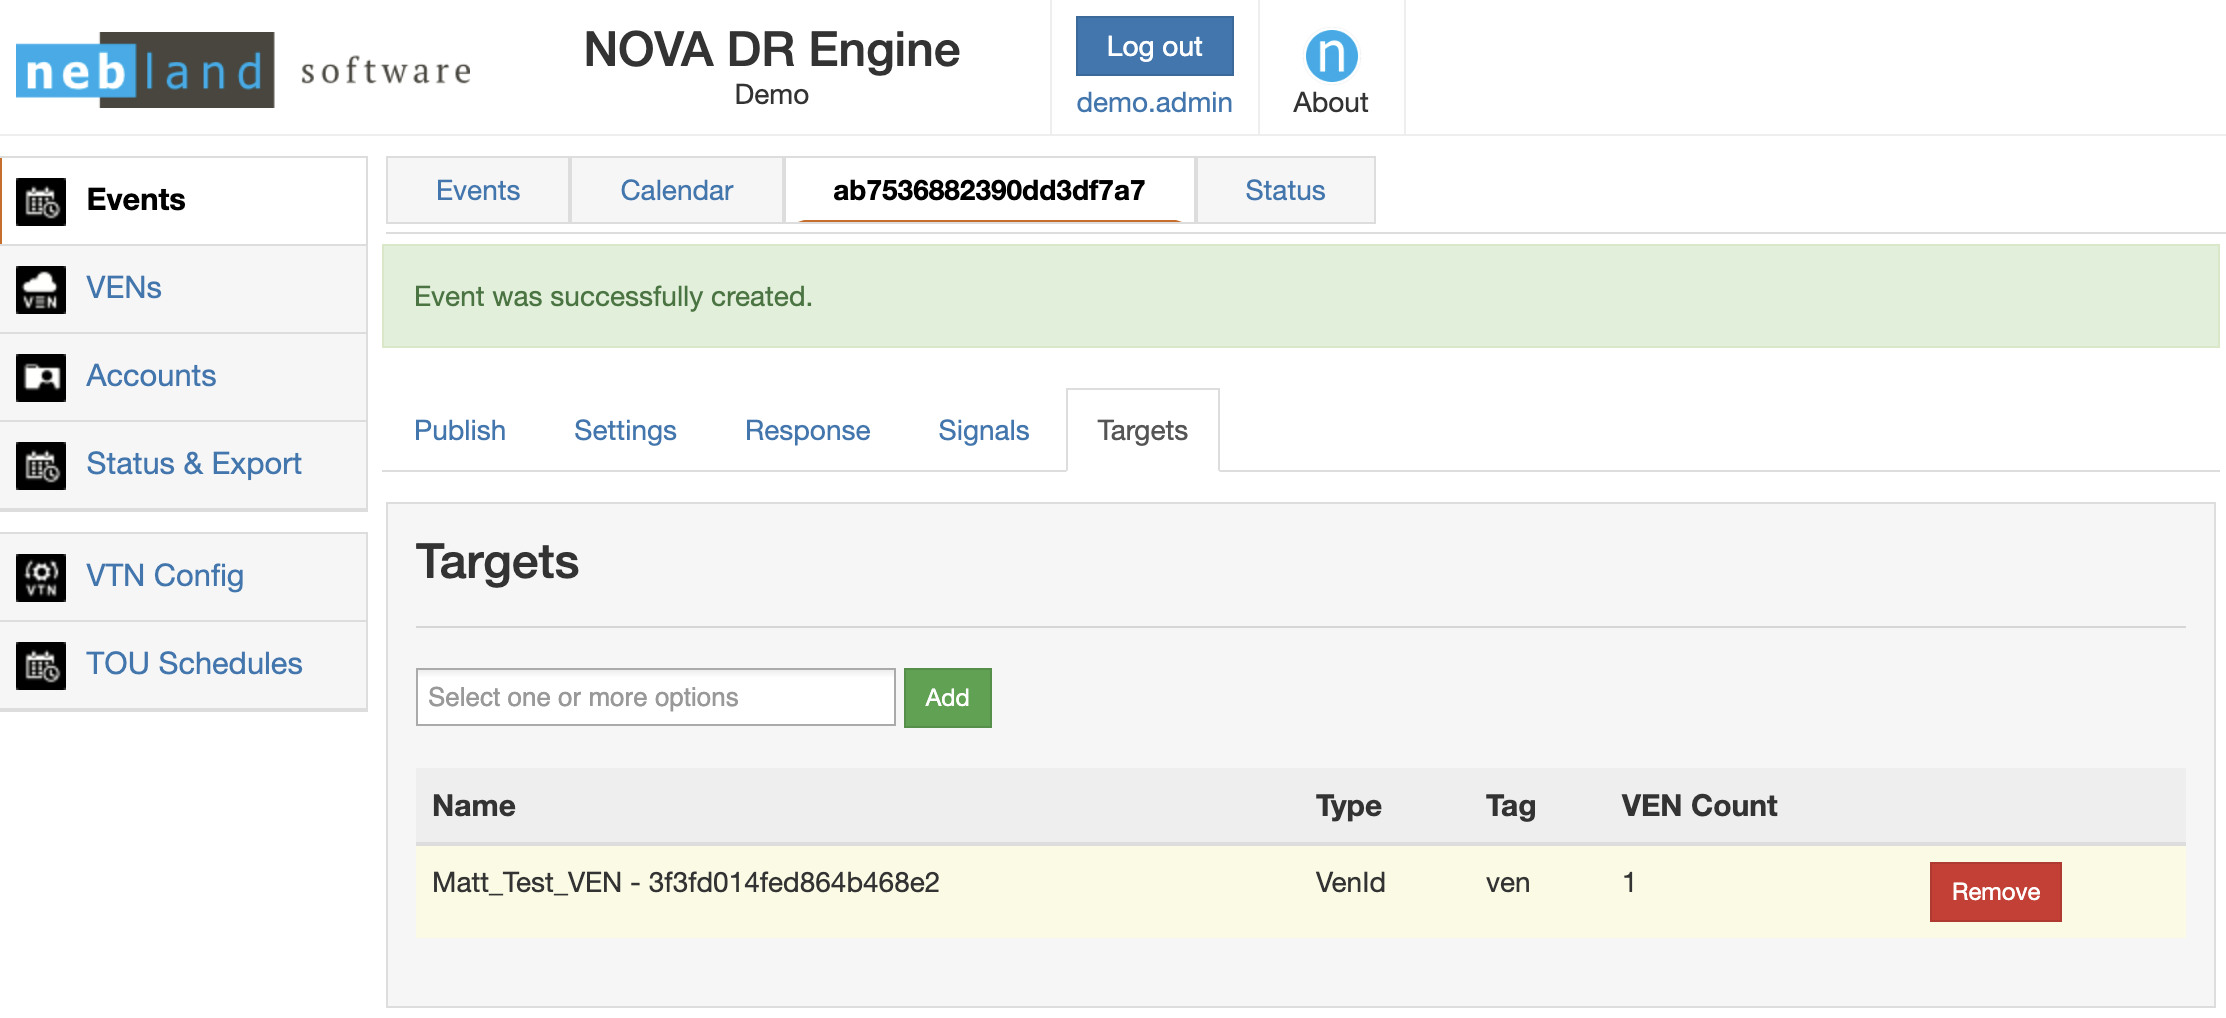
The Event is still a draft and not yet published. Before publishing, you need to add a target. Click on the "Target" tab. In the box, find the VEN that you added, and include it in "targets".
Now, go back to the "Publish" tab and click "Publish Event".
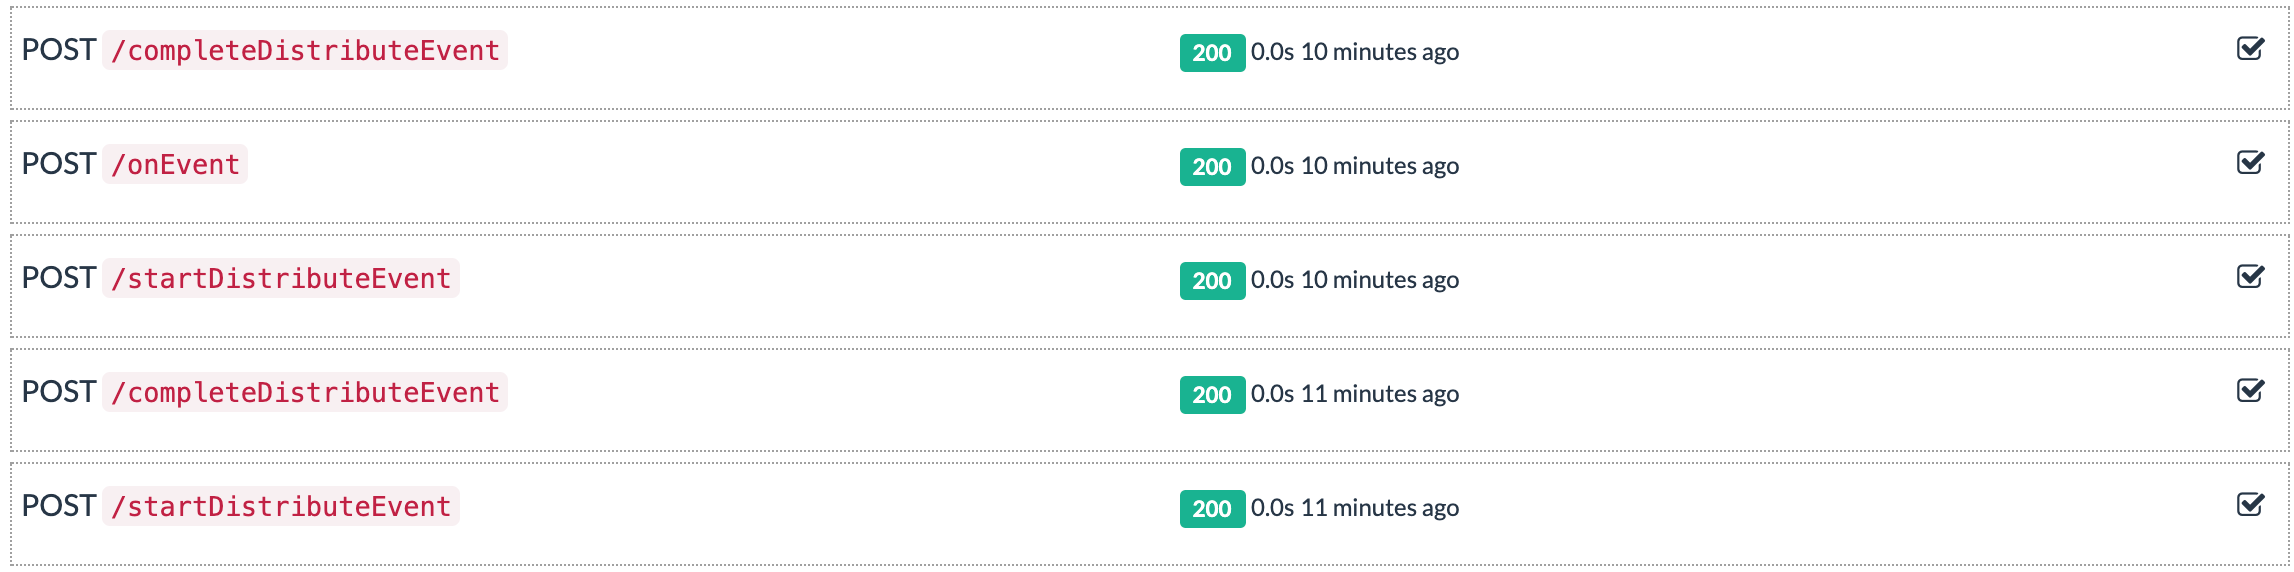
Next time the VEN polls, it will receive information about this event, and pass it through the plugin to the endpoint. After the event has started and completed, you should see the messages populated in the Beeceptor stream.
If you click on the event, you will see the payload delivered that describes the event. This is what will be parsed by your system.
That's all for the quick start. To recap:
- You configured, built, and ran your first VEN
- You connected it to a VTN
- You created an event and propagated it through the VEN
See the rest of the User Guide to find details on all of the functionality that you will need to achieve OpenADR certification and connect to load shifting programs.